包管理系统
主要作者
本文已完成,等待校对
包管理系统是现代 Linux 发行版的重要组成部分。以下介绍与 Debian 的包管理系统相关工具,例如 APT(Advanced Package Tool)。其他发行版的包管理系统会有所不同,可参考 Arch Linux Wiki 的 pacman/Rosetta 页面。
本文假设读者了解最基础的 apt 使用方法,如 apt install, apt remove, apt update, apt upgrade。
APT 常用操作
Debian 有多个与软件包管理相关的工具。
其中的底层工具为 dpkg。dpkg 不负责管理软件依赖关系,只管理具体某一个包的安装、卸载等操作。因此除非需要排查疑难问题,否则不应该直接使用 dpkg 修改系统状态。
避免在安装 deb 文件时使用 dpkg
网络上许多教程,甚至是一些官方文档,都会建议使用 dpkg -i 安装 deb 文件。当 deb 存在依赖,并且系统未安装满足要求的依赖时,直接使用 dpkg 会导致系统依赖管理出现问题,需要额外花费精力修复。
建议始终使用 apt install ./path/to/package.deb 的方式安装 deb 文件。
从用户视角来看,最常使用的工具是 apt(以及其他以 apt- 开头的命令)。
标记软件包为自动/手动安装
绝大多数软件包都不是孤立的:它们也有自己的依赖。那么,如果安装了一个带有其他依赖的软件,然后再删除这个软件,其引入的依赖不会被自动删除,不过:
# apt install x11-apps
Reading package lists... Done
Building dependency tree... Done
Reading state information... Done
The following additional packages will be installed:
  bsdextrautils bsdutils fontconfig-config fonts-dejavu-core groff-base libblkid1 libbrotli1 libbsd0 libexpat1 libfontconfig1 libfreetype6 libgdbm6 libice6 libmount1
  libpipeline1 libpng16-16 libsm6 libsmartcols1 libuchardet0 libuuid1 libx11-6 libx11-data libx11-xcb1 libxau6 libxaw7 libxcb-damage0 libxcb-present0 libxcb-xfixes0 libxcb1
  libxcursor1 libxdmcp6 libxext6 libxfixes3 libxft2 libxi6 libxkbfile1 libxmu6 libxmuu1 libxpm4 libxrender1 libxt6 man-db mount util-linux util-linux-extra x11-common
  xbitmaps
Suggested packages:
  groff gdbm-l10n cryptsetup-bin apparmor less www-browser nfs-common dosfstools kbd util-linux-locales mesa-utils
Recommended packages:
  uuid-runtime sensible-utils
The following NEW packages will be installed:
  bsdextrautils fontconfig-config fonts-dejavu-core groff-base libbrotli1 libbsd0 libexpat1 libfontconfig1 libfreetype6 libgdbm6 libice6 libpipeline1 libpng16-16 libsm6
  libuchardet0 libx11-6 libx11-data libx11-xcb1 libxau6 libxaw7 libxcb-damage0 libxcb-present0 libxcb-xfixes0 libxcb1 libxcursor1 libxdmcp6 libxext6 libxfixes3 libxft2
  libxi6 libxkbfile1 libxmu6 libxmuu1 libxpm4 libxrender1 libxt6 man-db x11-apps x11-common xbitmaps
The following packages will be upgraded:
  bsdutils libblkid1 libmount1 libsmartcols1 libuuid1 mount util-linux util-linux-extra
8 upgraded, 40 newly installed, 0 to remove and 4 not upgraded.
(以下省略)
# apt remove x11-apps
Reading package lists... Done
Building dependency tree... Done
Reading state information... Done
The following packages were automatically installed and are no longer required:
  fontconfig-config fonts-dejavu-core groff-base libbrotli1 libbsd0 libexpat1 libfontconfig1 libfreetype6 libgdbm6 libice6 libpipeline1 libpng16-16 libsm6 libuchardet0
  libx11-6 libx11-data libx11-xcb1 libxau6 libxaw7 libxcb-damage0 libxcb-present0 libxcb-xfixes0 libxcb1 libxcursor1 libxdmcp6 libxext6 libxfixes3 libxft2 libxi6
  libxkbfile1 libxmu6 libxmuu1 libxpm4 libxrender1 libxt6 man-db x11-common xbitmaps
Use 'apt autoremove' to remove them.
The following packages will be REMOVED:
  x11-apps
0 upgraded, 0 newly installed, 1 to remove and 4 not upgraded.
可以发现,虽然 x11-apps 在该环境中引入的依赖没有被自动删除,但是 APT 知道哪些依赖是不再被需要的了。这有赖于 APT 的软件包标记功能:用户直接安装的包会被标记为手动安装(manual),而被这样引入的依赖会被标记为自动安装(automatic)。于是,没有被任何手动安装的包直接以及间接依赖的自动安装的包就可以被 apt autoremove 移除。
apt-mark 命令可以显示、修改标记:
apt-mark showauto与apt-mark showmanual可以显示系统中被标记为自动安装与手动安装的包。apt-mark auto <package>与apt-mark manual <package>可以修改包的标记。
推荐与建议
安装软件包时,APT 在默认配置下会安装推荐(Recommended)的包。建议(Suggested)的包会显示在安装界面,但是不会自动被安装。例如在 Debian 12 中,docker.io 包的推荐有 apparmor、ca-certificates 等,建议包有 btrfs-progs、debootstrap 等。那么在安装 docker.io 时,包括 apparmor、ca-certificates 等包就会默认被安装,并且用户也可以看到这些包建议,并且可以在当前包安装完成后自行安装。
大部分情况下,被设置为「推荐」的包是有意义的,如果不安装,可能程序仍然可以运行,但是会缺失一些重要的功能。不过在某些环境下,例如容器场景,我们需要安装的包尽可能得少。为了精简安装的软件包,可以使用 --no-install-recommends 的选项,以跳过推荐的软件包。还可以在 apt.conf 配置中添加 Apt::Install-Recommends "false" 以使默认配置不会安装推荐的包。
使用 .conf.d 目录形式,避免直接修改 .conf 配置文件
对于绝大多数 Debian 包来说,软件包对应的配置文件(以下称为 .conf 文件)是直接由软件包安装(管理)的。尽管直接修改配置也可以达到目的,但是在软件包升级,特别是系统大版本更新时,apt 会要求用户手工介入配置冲突问题(保留原配置,或者安装新配置),会带来一些困扰。
目前大部分软件包的配置文件都支持 .conf.d 目录形式,允许用户以不同文件的形式添加自己的配置片段,对应的程序会「导入」这些配置。这种方式不仅可以避免直接修改软件包的配置文件,还可以更好地管理配置文件(例如,用户可以将不同目的的配置以不同的文件名存储,提升配置的可维护性)。
以上文的 apt.conf 为例,这里推荐的做法是在 /etc/apt/apt.conf.d/ 目录下创建一个新的 .conf 文件,在其中写入需要的配置,例如不安装推荐包:
某些软件会根据文件名的字典序来决定配置的优先级,因此这里使用 99 作为前缀,确保这个配置文件在其他配置文件之后被读取。
搜索包
Debian 与 Ubuntu 均提供了网页端搜索软件包的服务:Debian 软件包、Ubuntu Packages Search。不过,使用 apt 工具搜索来快得多。
apt search 与 apt 搜索模式
apt search <name> 会根据包名与描述进行包的查找,支持正则表达式:
$ apt search wayland
Sorting... Done
Full Text Search... Done
bemenu/noble 0.6.15+dfsg-1build2 amd64
  Dynamic menu inspired by dmenu

cage/noble 0.1.5+20240127-2build1 amd64
  Kiosk compositor for Wayland
(以下省略)
$ apt search ^docker
Sorting... Done
Full Text Search... Done
debocker/noble 0.2.5 all
  docker-powered package builder for Debian

docker-buildx/noble-updates 0.14.1-0ubuntu1~24.04.1 amd64
  Docker CLI plugin for extended build capabilities with BuildKit
(以下省略)
不过,有些时候这种搜索也不太符合需求,例如有些时候我们只想搜索包名等,此时可以使用 apt 搜索模式(search pattern)来进行更具体的查找。完整文档可以参考 apt-patterns(7)。搜索模式不适用于 apt search,但适用于其他各类 apt 命令,例如 apt list、apt show、apt remove 等。
以下是一些常见的 apt 搜索模式,句尾括号为更加繁琐的完整表示:
~nREGEX包名称满足正则表达式的包(?name(REGEX))。~c已经删除,但是仍然有配置残留的包,可以使用apt purge彻底删除(?config-files)。~i为已经安装的包(?installed)。~U可以升级的包(?upgradable)。~o远程已经不再存在的包,一般是在系统大版本更新后残留的旧包,或者是本地手动安装的包(?obsolete,在apt list的输出中显示为[installed,local])。
搜索模式练习
请尝试写出以下查询的搜索模式,并且在自己的环境中试一试:
- 输出(提示:
apt list)所有未完全删除以及远程仓库不再提供的包(虽然apt purge也支持搜索模式,小心执行,因为所有配置都会被删除!) - 输出本地安装的名字里有
top的所有包- 提示:可以像这样要求同时满足多个 pattern:
apt list 'P1 P2 P3'
- 提示:可以像这样要求同时满足多个 pattern:
文件搜索:apt-file
如果使用过默认安装的 Ubuntu 的话,可能会发现,在输入命令时,如果命令不存在,会有类似下面的提示:
这是由 command-not-found 包支持的,不过可以注意到,这一项功能会拖慢与 shell 交互时的速度,因此这里更加推荐删除这个包,只在需要的时候用 apt-file 命令搜索。
在操作前,需要执行 apt-file update 命令更新本地文件与包关系的数据库的初始化及更新。之后使用 apt-file search <file> 就可以搜索包含某个文件的包:
$ apt-file search execsnoop
bpfcc-tools: /usr/sbin/execsnoop-bpfcc
bpfcc-tools: /usr/share/doc/bpfcc-tools/examples/doc/execsnoop_example.txt
bpfcc-tools: /usr/share/man/man8/execsnoop-bpfcc.8.gz
bpftrace: /usr/sbin/execsnoop.bt
bpftrace: /usr/share/doc/bpftrace/examples/execsnoop_example.txt
bpftrace: /usr/share/man/man8/execsnoop.bt.8.gz
golang-github-iovisor-gobpf-dev: /usr/share/gocode/src/github.com/iovisor/gobpf/examples/bcc/execsnoop/execsnoop.go
golang-github-iovisor-gobpf-dev: /usr/share/gocode/src/github.com/iovisor/gobpf/examples/bcc/execsnoop/output.go
libbpf-tools: /usr/sbin/execsnoop
pcp: /usr/lib/pcp/pmdas/bcc/modules/execsnoop.bpf
pcp: /usr/lib/pcp/pmdas/bcc/modules/execsnoop.python
pcp: /usr/lib/pcp/pmdas/bpf/modules/execsnoop.so
pcp: /usr/share/pcp/htop/screens/execsnoop
pcp: /var/lib/pcp/pmdas/bcc/modules/execsnoop.bpf
pcp: /var/lib/pcp/pmdas/bcc/modules/execsnoop.python
pcp: /var/lib/pcp/pmdas/bpf/modules/execsnoop.so
perf-tools-unstable: /usr/sbin/execsnoop-perf
perf-tools-unstable: /usr/share/doc/perf-tools-unstable/examples/execsnoop_example.txt
perf-tools-unstable: /usr/share/man/man8/execsnoop-perf.8.gz
systemtap-doc: /usr/share/systemtap/examples/lwtools/execsnoop-nd.8
systemtap-doc: /usr/share/systemtap/examples/lwtools/execsnoop-nd.meta
systemtap-doc: /usr/share/systemtap/examples/lwtools/execsnoop-nd.stp
systemtap-doc: /usr/share/systemtap/examples/lwtools/execsnoop-nd_example.txt
此外,apt-file list <package> 可以查看某个包中包含的文件:
$ apt-file list htop
htop: /usr/bin/htop
htop: /usr/share/applications/htop.desktop
htop: /usr/share/doc/htop/AUTHORS
htop: /usr/share/doc/htop/README.gz
htop: /usr/share/doc/htop/changelog.Debian.gz
htop: /usr/share/doc/htop/copyright
htop: /usr/share/icons/hicolor/scalable/apps/htop.svg
htop: /usr/share/man/man1/htop.1.gz
htop: /usr/share/pixmaps/htop.png
使用 dpkg 类命令在已安装的包内查找文件
apt-file 依赖于对完整仓库的索引,并且搜索也是一个略微耗时的过程。如果只需要确认本地已经安装的包,以及已有的 deb 包文件中的文件情况,有更快的方法:
dpkg-query -S <file>可以查找所有已安装包中的文件。dpkg-deb -c <name_version.deb>可以查看.deb文件中的内容。dpkg-query -L <name>查看给定的安装了的包提供了哪些文件。
这几条命令的 dpkg-* 部分都可以直接替换为 dpkg,例如 dpkg -S、dpkg -c 等,dpkg 命令前端会帮你把请求转发到正确的子命令上。
固定包
有时我们希望固定一个包,使得这个包不会被安装或升级,例如:
- 我们自行打包了某个有 bug 的包的修复版本,同时不希望系统自动升级到官方的版本。这时可以使用
apt-mark hold <name>来标记这个包为固定的。 -
我们不希望 Ubuntu 服务器安装 Snap,此时可以使用
apt-mark hold snapd来固定(阻止)Snap 的安装:$ sudo apt-mark hold snapd $ sudo apt install chromium Reading package lists... Done Building dependency tree... Done Reading state information... Done Note, selecting 'chromium-browser' instead of 'chromium' Some packages could not be installed. This may mean that you have requested an impossible situation or if you are using the unstable distribution that some required packages have not yet been created or been moved out of Incoming. The following information may help to resolve the situation: The following packages have unmet dependencies: chromium-browser : PreDepends: snapd but it is not going to be installed E: Unable to correct problems, you have held broken packages.
apt-mark unhold 可以取消固定,而 apt-mark showhold 可以查看所有被固定的包。
Alternatives
Debian 的 Alternatives 机制允许系统安装同一软件的多个版本(例如 Java),或者同一类型软件的多个实现(例如文本编辑器),并且用户可以切换默认使用的版本。/etc/alternatives/ 目录包含了所有在 Alternatives 机制下的软链接。以 editor 为例,在 Debian 下 /usr/bin/editor 是一个指向 /etc/alternatives/editor 的软链接,而 /etc/alternatives/editor 指向的对象由用户配置决定。
使用 update-alternatives 命令可以管理 Alternatives 机制的映射:
$ ls -lh /etc/alternatives/editor
lrwxrwxrwx 1 root root 9 Aug  29 2022  /etc/alternatives/editor -> /bin/nano
$ sudo update-alternatives --config editor
There are 4 choices for the alternative editor (providing /usr/bin/editor).

  Selection    Path                Priority   Status
------------------------------------------------------------
* 0            /bin/nano            40        auto mode
  1            /bin/ed             -100       manual mode
  2            /bin/nano            40        manual mode
  3            /usr/bin/vim.basic   30        manual mode
  4            /usr/bin/vim.tiny    15        manual mode

Press <enter> to keep the current choice[*], or type selection number: 3
update-alternatives: using /usr/bin/vim.basic to provide /usr/bin/editor (editor) in manual mode
$ ls -lh /etc/alternatives/editor
lrwxrwxrwx 1 root root 18 Feb  9 15:54 /etc/alternatives/editor -> /usr/bin/vim.basic
自动更新
一般而言,使用 apt 的系统默认安装了 unattended-upgrades 包,如果系统上没有,安装该包即可。一些 Debian 系统镜像在预配置阶段会关闭自动更新,这可以通过以下命令确认(需要安装 debconf-utils 包):
如果输出的内容类似下面:
则代表自动更新被关闭,反之则启用。可以执行 dpkg-reconfigure unattended-upgrades 修改配置。当自动更新启用时,/etc/apt/apt.conf.d/20auto-upgrades 文件应当存在。
可以使用以下命令:
查看并确认系统自动更新时的行为。默认情况下,自动更新只会操作 Debian 官方上游的包,用户自己设置的源不会被自动更新,这一点可以在 /etc/apt/apt.conf.d/50unattended-upgrades 文件中验证:
// Automatically upgrade packages from these (origin:archive) pairs
//
// Note that in Ubuntu security updates may pull in new dependencies
// from non-security sources (e.g. chromium). By allowing the release
// pocket these get automatically pulled in.
Unattended-Upgrade::Allowed-Origins {
    "${distro_id}:${distro_codename}";
    "${distro_id}:${distro_codename}-security";
    // Extended Security Maintenance; doesn't necessarily exist for
    // every release and this system may not have it installed, but if
    // available, the policy for updates is such that unattended-upgrades
    // should also install from here by default.
    "${distro_id}ESMApps:${distro_codename}-apps-security";
    "${distro_id}ESM:${distro_codename}-infra-security";
//  "${distro_id}:${distro_codename}-updates";
//  "${distro_id}:${distro_codename}-proposed";
//  "${distro_id}:${distro_codename}-backports";
};
此外,systemd 服务 unattended-upgrades.service 会确保系统在关机或重启前正确进行软件包升级的收尾工作。因此也需要确认该服务已启动并会开机自启。
APT 前端
APT 面向用户使用的前端除了 apt 以外,还有 apt-get、aptitude 和 synaptic 等。其中 apt-get 是早期的 Debian 的包管理工具,基础功能与 apt 类似(如 apt-get update、apt-get install 等),但是用户体验不如 apt 友好,由于其交互界面不再变化,因此仅适用于需要使用脚本交互的场景;synaptic 是图形界面的包管理工具(中文名为「新立得软件包管理器」)。
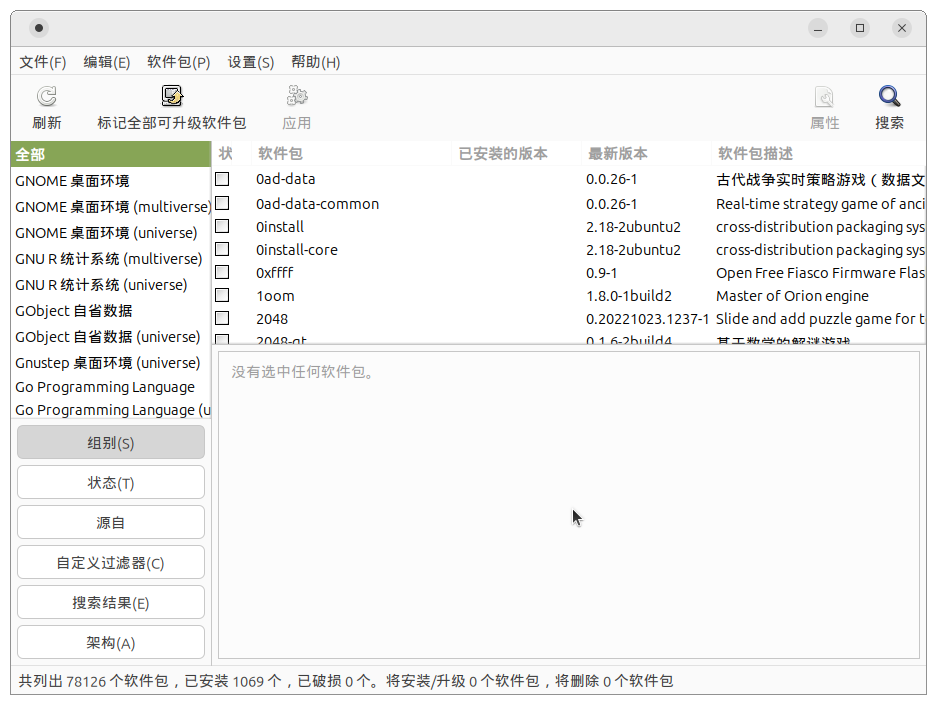
Ubuntu 24.04 下的新立得软件包管理器截图
aptitude 提供了 TUI 界面的包管理功能,不过对于运维的场景下,其更加重要的是相比于 apt 更灵活的依赖解析功能。在系统出现损坏包的情况下,apt 可能无法提供有效的解决方案,而 aptitude 会计算出多种解法,并且提供给用户选择。
完整性校验
dpkg 可以对已经安装的包进行完整性校验。dpkg --verify <name> 可以校验已经安装的包的完整性,可以省略 <name> 选项,以对于所有包进行检查。如果怀疑软件包文件因意外被破坏(例如在升级时断电,或误删除等),可以使用该命令确认哪些软件包需要重新安装。
检查某系统强制重启后无法开机的问题
一个现实发生的例子是,某系统强制重启后无法正常开机,提示:
[    4.634427] systemd[1]: Assertion 'close_nointr(fd) != -EBADF' failed at src/basic/fd-util.c:77, function safe_close(). Aborting.
[    4.635043] systemd[1]: Caught <ABRT> from our own process.
[    4.635624] systemd[1]: Caught <ABRT>, core dump failed (child 225, code=killed, status=6/ABRT).
[    4.635750] systemd[1]: Freezing execution.
使用 ISO 引导后 chroot 到系统,执行 dpkg --verify,发现:
重新安装 libsystemd-shared 包后,问题解决。
dpkg --verify 默认输出为 rpm -V 风格,类似如下:
dpkg 目前只会检查文件的 MD5(即上面的 5),因此其他列均标记为 ?(未检查)。c 代表是配置文件,missing 代表文件不存在。
dpkg --verify 不是为安全性用途设计的
如果怀疑攻击者已经有对应机器的 root 权限,那么 dpkg --verify 的结果是不可信的,因为攻击者可以修改 dpkg 本身,或者修改本地的包数据库。
软件优先级
有时候,我们会设置多个不同的源,而这些源会提供相同名称的软件包,例如:
- 正常安装的系统中,security 源提供了一些主源已有的软件包的,包含安全修复的更新版本。
- 在 stable 版本的 Debian 中添加 backports 源,以获取一些来自 testing 的,在 stable 下重新编译的新版本的软件包。
- Ubuntu 源中的
firefox为 Snap 包,而来自 Mozilla 的 APT 仓库的firefox为原生的 deb 包(Mozilla 的帮助信息)。
APT 选择包的逻辑并非单纯的「版本越新越好」(比如,用户添加 backports 源不代表用户希望所有 backports 有的软件都安装最新版本),而是根据优先级来选择。默认的优先级为 500,如果优先级一致,才会根据版本号来选择。
Backports 源的优先级为 100,因为其 Release 文件中 NotAutomatic 和 ButAutomaticUpgrades 字段都为 yes,因此 APT 会授予 backports 100 的优先级。如果只有 NotAutomatic 为 yes,则优先级为 1。
我们通过 apt-cache policy <name> 查看包的安装状态与优先级信息,以某配置了 backports、deb-multimedia,并且有一段时间未升级的系统为例:
$ apt-cache policy yt-dlp
yt-dlp:
  Installed: 1:2024.10.07-dmo1
  Candidate: 1:2025.01.26-dmo1
  Version table:
     1:2025.01.26-dmo1 500
        500 http://mirrors.ustc.edu.cn/deb-multimedia bookworm/main amd64 Packages
 *** 1:2024.10.07-dmo1 100
        100 /var/lib/dpkg/status
     2025.01.26-1~bpo12+1 100
        100 http://mirrors.ustc.edu.cn/debian bookworm-backports/main amd64 Packages
     2023.03.04-1 500
        500 http://mirrors.ustc.edu.cn/debian bookworm/main amd64 Packages
可以看到,APT 已知四个不同的 yt-dlp 版本,分别是 deb-multimedia 的 1:2025.01.26-dmo1、本地安装的 1:2024.10.07-dmo1、backports 的 2025.01.26-1~bpo12+1 以及官方源的 2023.03.04-1。特别地,本地的版本的优先级为 100。因此当执行更新命令时,APT 会首先选择优先级最高的(deb-multimedia 或者官方源),然后选择版本最高的(1:2025.01.26-dmo1)。
如果本地的版本比远程的版本更高……
此时 APT 不会降级软件包,除非远程对应的优先级超过 1000。如果需要手动降级,可以使用 apt install <name>=<version>。
如果需要指定从某个特定的源安装软件包,可以使用 -t 选项,例如:
这样就会安装 backports 源中的 yt-dlp。其实际上是把 bookworm-backports 源的优先级临时拉高到了 990:
$ apt-cache policy -t bookworm-backports yt-dlp
yt-dlp:
  Installed: 1:2024.10.07-dmo1
  Candidate: 1:2025.01.26-dmo1
  Version table:
     1:2025.01.26-dmo1 500
        500 http://mirrors.ustc.edu.cn/deb-multimedia bookworm/main amd64 Packages
 *** 1:2024.10.07-dmo1 100
        100 /var/lib/dpkg/status
     2025.01.26-1~bpo12+1 990
        990 http://mirrors.ustc.edu.cn/debian bookworm-backports/main amd64 Packages
     2023.03.04-1 500
        500 http://mirrors.ustc.edu.cn/debian bookworm/main amd64 Packages
用户也可以手动配置软件的优先级,相关配置位于 /etc/apt/preferences 和 /etc/apt/preferences.d/ 中。优先级配置条目的一般格式如下:
例如:
那么 packages.mozilla.org 拥有的包会优先于官方仓库被选择。优先级系统也可以用来固定包,例如将 mtr-tiny 包固定在 0.87 版本:
详细文档请参考 apt_preferences(5)。
使用优先级机制阻止软件包安装
当 Pin-Priority 为负数时,APT 会拒绝安装这个包。请阅读文档,尝试创建一个配置文件,阻止安装 snapd(可在 Ubuntu 容器中实验)。
DEB 软件包
本节介绍 DEB 软件包包含的内容,以及如何在已有的基础上进行简单的修改与打包操作。
如果对为 Debian 打包感兴趣,强烈建议阅读 Debian 维护者指南。其包含了全面、完整的打包流程的介绍,以及最佳实践等。以下提供的步骤仅适用于简单、非官方的需求。
软件包结构
Deb 包是一个 ar 格式的包,包含三个文件(可以使用 ar t 查看,ar x 解压):
debian-binary:包含版本号的文本文件,目前版本为2.0。control.tar.xz(或control.tar.zst等):包含软件包的元数据,例如软件包的依赖、描述、安装脚本等。data.tar.xz(或data.tar.zst等):包含软件包的实际文件。
ar 与 tar
ar 格式(1971)与 tar(1979)类似,都是归档格式。由于 ar 不支持目录,因此目前 ar 仅用于生成静态链接库(.a 文件)与 deb 包。
control
control.tar.xz 中的 control 文件是包的元数据,包含版本、依赖、描述、维护者等等信息,类似如下:
Package: sudo
Version: 1.9.9-1ubuntu2.3
Architecture: amd64
Maintainer: Ubuntu Developers <[email protected]>
Installed-Size: 2504
Depends: libaudit1 (>= 1:2.2.1), libc6 (>= 2.34), libpam0g (>= 0.99.7.1), libselinux1 (>= 3.1~), zlib1g (>= 1:1.2.0.2), libpam-modules, lsb-base
Conflicts: sudo-ldap
Replaces: sudo-ldap
Section: admin
Priority: optional
Homepage: https://www.sudo.ws/
Description: Provide limited super user privileges to specific users
 Sudo is a program designed to allow a sysadmin to give limited root
 privileges to users and log root activity.  The basic philosophy is to give
 as few privileges as possible but still allow people to get their work done.
 .
 This version is built with minimal shared library dependencies, use the
 sudo-ldap package instead if you need LDAP support for sudoers.
Original-Maintainer: Sudo Maintainers <[email protected]>
有关具体各个字段的含义,可参考 Debian Policy Manual 的第五章 Control files and their fields 与第七章 Declaring relationships between packages。
其他文件
此外,control.tar.xz 可以包含一些 hook 脚本,在安装与删除前后进行操作,包括 preinst, prerm, postinst, postrm。还可以包含以下文件:
md5sums,用于校验包文件的完整性。conffiles,标志包安装的哪些文件是配置文件。shlibs,如果软件包包含了动态库(.so),那么这个文件就需要包含库的版本信息,以帮助其他软件包解决相关的依赖问题。triggers,定义了软件包感兴趣(interest)的触发器,以及软件包状态变化时会触发(activate)的触发器。
获取软件包源码
Debian 目前大多数的包的源代码都可以在 Debian Salsa GitLab 上找到,可以在 Debian Package Tracker 上找到相关信息。
除了直接使用 git clone 之外,还可以使用 apt source <package> 来下载源码。需要注意的是,该功能需要安装 dpkg-dev,且需要在 /etc/apt/sources.list 或 /etc/apt/sources.list.d/debian.sources 中添加 deb-src,类似于这样:
或者这样(DEB822):
Types: deb deb-src
URIs: http://deb.debian.org/debian/
Suites: bookworm
Components: main
Signed-By: /usr/share/keyrings/debian-archive-keyring.gpg
DEB822
DEB822 是 Debian 新的仓库配置格式,用于取代旧的 sources.list 格式(又被称为 One-Line-Style 格式)。详情可阅读 https://repolib.readthedocs.io/en/latest/deb822-format.html。
apt source 会下载必要的文件、解压并应用 Debian 的补丁:
$ apt source sudo
Reading package lists... Done
NOTICE: 'sudo' packaging is maintained in the 'Git' version control system at:
https://salsa.debian.org/sudo-team/sudo.git
Please use:
git clone https://salsa.debian.org/sudo-team/sudo.git
to retrieve the latest (possibly unreleased) updates to the package.
Skipping already downloaded file 'sudo_1.9.13p3-1+deb12u1.dsc'
Skipping already downloaded file 'sudo_1.9.13p3.orig.tar.gz'
Skipping already downloaded file 'sudo_1.9.13p3.orig.tar.gz.asc'
Skipping already downloaded file 'sudo_1.9.13p3-1+deb12u1.debian.tar.xz'
Need to get 0 B of source archives.
dpkg-source: info: extracting sudo in sudo-1.9.13p3
dpkg-source: info: unpacking sudo_1.9.13p3.orig.tar.gz
dpkg-source: info: unpacking sudo_1.9.13p3-1+deb12u1.debian.tar.xz
dpkg-source: info: using patch list from debian/patches/series
dpkg-source: info: applying debian-bug-1039557
dpkg-source: info: applying paths-in-samples.diff
dpkg-source: info: applying Whitelist-DPKG_COLORS-environment-variable.diff
dpkg-source: info: applying sudo-ldap-docs
修改软件包源码
得到的源码中除了软件包本身的代码以外,还有 debian 目录。这个目录包含了软件包的构建相关信息,包括 control、changelog、patches/ 等等。
使用 quilt 管理补丁
补丁简介
补丁是后缀为 patch 的文件,由 diff 生成。补丁有多种不同的格式:unified diff (diff -u)、context diff (diff -c) 和 normal diff(默认)。其中最常见的是 unified diff 格式,类似如下(命令为 diff -u test.txt test_new.txt):
--- test.txt    2025-02-07 16:00:16.591987241 +0800
+++ test_new.txt    2025-02-07 16:00:28.462299382 +0800
@@ -1 +1 @@
-Hello, world!
+Goodbye, world!
Git 也可以使用 git diff 来生成补丁,一个例子:
diff --git a/pytorch/sync.py b/pytorch/sync.py
index 577a88f..0e6b4d8 100644
--- a/pytorch/sync.py
+++ b/pytorch/sync.py
@@ -4,7 +4,7 @@ import httpx
from pathlib import Path
import os
import re
-from urllib.parse import urlparse, urljoin
+from urllib.parse import urlparse, urljoin, unquote
import asyncio
import time

@@ -83,7 +83,7 @@ async def get_with_progress(client: httpx.AsyncClient, url: str):


async def recursive_download(client: httpx.AsyncClient, url: str):
-    path = urlparse(url).path
+    path = unquote(urlparse(url).path)
    while path.startswith("/"):
        path = path[1:]
    if url.endswith("/"):
生成的补丁可以使用 patch 命令应用在未打补丁的文件上:
发行版打包的软件包很多时候需要在原始代码上做一些修改(例如修复 bug,添加功能等),而补丁管理工具可以省掉一些麻烦。尽管对简单修改代码的需求来说,也可以绕过补丁系统,直接编辑,但是这会在日后升级软件版本时带来麻烦,因此这里会介绍与补丁管理有关的主题。quilt 是一个栈式(stack)的补丁管理工具。首先配置 ~/.quiltrc 如下:
之后就可以使用 quilt 查看当前目录的补丁情况:
$ quilt series
debian-bug-1039557
paths-in-samples.diff
Whitelist-DPKG_COLORS-environment-variable.diff
sudo-ldap-docs
$ quilt applied
debian-bug-1039557
paths-in-samples.diff
Whitelist-DPKG_COLORS-environment-variable.diff
sudo-ldap-docs
$ quilt unapplied
File series fully applied, ends at patch sudo-ldap-docs
$
可以看到,所有的补丁都已经被应用。可以使用 quilt pop 和 quilt push 取消/应用最底层的补丁。我们需要将我们的修改添加为新的补丁,因此:
$ quilt new custom-patch.diff
$ quilt add src/sudo.c  # 将修改前的文件 add 到 quilt 中
File src/sudo.c added to patch custom-patch.diff
$ # 如果误操作将修改后的文件 add 了,quilt remove 即可。
$ vim src/sudo.c  # 随便做一些修改,比如在 main() 最开始用 printf() 输出一行文本
$ quilt refresh  # 刷新补丁
Refreshed patch custom-patch.diff
可以验证:
Index: sudo-1.9.13p3/src/sudo.c
===================================================================
--- sudo-1.9.13p3.orig/src/sudo.c   2025-02-07 17:37:38.372195671 +0800
+++ sudo-1.9.13p3/src/sudo.c    2025-02-07 17:37:50.968524513 +0800
@@ -149,6 +149,7 @@
     const char * const allowed_prognames[] = { "sudo", "sudoedit", NULL };
     sigset_t mask;
     debug_decl_vars(main, SUDO_DEBUG_MAIN);
+    printf("Hello, world!\n");

     /* Only allow "sudo" or "sudoedit" as the program name. */
     initprogname2(argc > 0 ? argv[0] : "sudo", allowed_prognames);
如果是已有的 .patch 文件,则可以使用 quilt import <file> 命令将其导入到补丁栈中。
更新修改记录
debian/changelog 文件包含了包完整的修改记录,格式类似如下:
sudo (1.9.13p3-1+deb12u1) bookworm; urgency=medium

  * add upstream patch to fix event log format.
    Thanks to Kimmo Suominen (Closes: #1039557)

 -- Marc Haber <[email protected]>  Tue, 27 Jun 2023 13:45:00 +0200
建议使用 dch (debchange) 命令来更新这个文件,以下命令会创建一个新的版本号,并且打开编辑器以编辑修改记录:
EMAIL=[email protected] dch -i
编辑结果类似如下:
sudo (1.9.13p3-1+deb12u1.1) UNRELEASED; urgency=medium

  * Non-maintainer upload.
  * Add "Hello, world!\n" in main().
  * Test with very simple packaging.

 -- yourname <[email protected]>  Fri, 07 Feb 2025 17:48:19 +0800
构建软件包
在构建之前,我们需要确保构建需要的依赖已经安装:
从源代码目录构建软件包的命令为 dpkg-buildpackage,执行以下命令即可:
-b 代表构建二进制包,而由于我们很明显没法签名,因此需要使用 -uc 和 -us 选项来跳过对变更(changes)与源代码包(source package)的签名。构建完成后,我们可以在上一级目录找到 1.9.13p3-1+deb12u1.1 这个版本的 sudo 的 deb 包,以及其调试符号包。
可以试试安装一下:
试完记得装回正常的版本哦!
$ apt-cache policy sudo
sudo:
  Installed: 1.9.13p3-1+deb12u1.1
  Candidate: 1.9.13p3-1+deb12u1.1
  Version table:
 *** 1.9.13p3-1+deb12u1.1 100
        100 /var/lib/dpkg/status
     1.9.13p3-1+deb12u1 990
        990 http://mirrors.ustc.edu.cn/debian bookworm/main amd64 Packages
$ sudo apt install sudo=1.9.13p3-1+deb12u1
Hello, world!
(以下省略)
$ sudo uname
Linux
简易软件包打包
以上介绍了从官方源代码包中打包的过程。不过有时候,我们的需求是从零开始打包一个软件包。以下提供一些简单的例子。
配置类软件包
USTC-vlab/deb 是 Vlab 项目为学生虚拟机(容器)提供的一部分补充包仓库,所有的包均为简单的配置文件与脚本。
这一类不需要编译操作的包目录树类似如下,DEBIAN 目录包含了打包后 control.tar.xz 的内容,剩下的内容则组成了 data.tar.xz:
.
├── DEBIAN
│   ├── control
│   ├── postinst
│   └── preinst
└── etc
    ├── lightdm
    │   └── lightdm.conf
    └── vlab
        ├── greeter-setup.sh
        └── vncserver-lightdm
dpkg-deb --build -Z <dir> <output_dir> 可以将 <dir> 目录下的内容打包为 deb 包,存储到 <output_dir> 目录中(-Z 压缩默认为 xz)。
特别地,如果这一类软件包需要覆盖其他软件包的文件,可以使用 dpkg-divert 命令。例如,vlab-vnc 包需要覆盖 lightdm 的配置文件 /etc/lightdm/lightdm.conf,因此其在 preinst 中使用了以下命令:
dpkg-divert --package vlab-vnc --divert /etc/lightdm/lightdm.conf.dpkg-divert --add /etc/lightdm/lightdm.conf
再例如,该仓库中修改后的 firefox 需要移除/重命名 /usr/share/mate/applications/firefox.desktop,因此在 preinst 中使用了以下命令:
MATE_DESKTOP=/usr/share/mate/applications/firefox.desktop
dpkg-divert --rename --divert "$MATE_DESKTOP".dpkg-divert "$MATE_DESKTOP"
同时,hook 脚本在执行时的 argv[1] 为用户执行的操作(例如 install, upgrade 等),因此脚本中可以根据操作执行不同的命令,类似如下:
case "$1" in
    install)
        # do something
        ;;
    upgrade|abort-upgrade)
        # do something
        ;;
    *)
        echo "postinst called with unknown argument \`$1'" >&2
        exit 0
        ;;
esac
使用 checkinstall 快速打包
checkinstall 工具仅适用于临时打包
checkinstall 的工作原理是,在 make install 使用 installwatch 环节拦截文件相关系统调用(类似 strace),检查文件的变化,并将其打包为 deb 包。因此其只适用于使用 Makefile 构建系统(包括 cmake、autotools 等)的软件包。并且 checkinstall 的工作原理决定了其无法处理复杂的软件包,例如如果某软件包在安装时修改了 /etc/passwd,那么 checkinstall 无法正确打包这个软件包——在卸载时可能会破坏系统1。
Debian 打包是一项复杂的工作。针对不同的编程语言与构建系统,Debian 提供了一些工具(例如 dh-make-golang 可以打包 Go 语言项目)辅助打包,建议在操作前先行搜索。debmake 工具也可以帮助生成一些 Debian 打包的模板文件。
以下以编译 rsync 为例子介绍。首先正常配置并编译:
然后执行 checkinstall:
checkinstall 会询问一些问题,例如软件包的名称、版本、描述等等。版本默认为空,但是必须填写,否则后续步骤会报错。配置并安装完成后:
**********************************************************************

 Done. The new package has been installed and saved to

 /path/to/rsync/rsync_3.4.1-7_amd64.deb

 You can remove it from your system anytime using:

      dpkg -r rsync

**********************************************************************
可以看到 rsync 安装在了 /usr/local/bin/ 下:
在卸载前,建议手工检查生成的 deb 包,避免其他文件被删除。
软件源目录结构
Debian 的软件源存储了多个软件包,以 APT 可以理解的格式提供给用户。
简单结构与生成示例
最简单的软件源目录结构如下:
.
├── firefox-vlab_1vlab3_all.deb
├── Packages
├── Release
├── vlab-cli_1.0-1_all.deb
├── vlab-earlyoom_1.1-5_all.deb
├── vlab-earlyoom-static_1.1-5_amd64.deb
└── vlab-vnc_1.0-3_all.deb
除了 deb 文件以外,两个关键的文件是 Packages 与 Release。Packages 文件类似于将所有包的 control 文件连接起来,像这样:
Package: firefox-vlab
Version: 2:1vlab3
Architecture: all
Origin: Ubuntu
Maintainer: USTC Vlab <[email protected]>
Pre-Depends: debconf
Depends: debconf (>= 0.5) | debconf-2.0
Breaks: firefox, firefox-dbg, firefox-dev, firefox-geckodriver, firefox-mozsymbols
Replaces: firefox, firefox-dbg, firefox-dev, firefox-geckodriver, firefox-mozsymbols
Provides: gnome-www-browser, iceweasel, www-browser, x-www-browser
Filename: ./firefox-vlab_1vlab3_all.deb
Size: 7376
MD5sum: 943c78a714ec598de5ccb1a1d704fa4d
SHA1: 7818966860329bc18ff224b8ff549006a3ef8146
SHA256: a9e1d012abe7dc4e341674770d6297b7acea0e3dfb541f189e02f1c8ffe9715a
Section: web
Priority: optional
Description: System files for Firefox on Vlab Software

Package: vlab-cli
Version: 1.0-1
Architecture: all
Maintainer: USTC Vlab <[email protected]>
Depends: bash (>= 4.2)
Recommends: vlab-vnc
Filename: ./vlab-cli_1.0-1_all.deb
Size: 1440
MD5sum: 8411c78ab73dc18c914c7409e3c22357
SHA1: c3a5da87a8e5ebc3729a3afda5779413c6bc8b3a
SHA256: 58a804b96e7b8bdd450436ca07c75d7a2e05cd121a680dd17474514736d7c99e
Section: base
Priority: optional
Description: CLI for legacy Vlab VM settings
不过其包含一些新的字段,例如 Filename(仓库中的路径)、Size、MD5sum、SHA1 与 SHA256。该文件使用 dpkg-scanpackages 生成:
而 Release 文件则包含了软件源的元数据,例如:
Date: Fri, 07 Feb 2025 16:21:05 +0000
Label: Vlab
Origin: vlab.ustc.edu.cn
MD5Sum:
 ddf53358082c24a5c89516c46eb00b0d             2770 Packages
 1e0a4d927bce3b4c809157264c731de9               75 Release
SHA1:
 0be434c15790a9875f4217709996d1140abc330b             2770 Packages
 43414ec15d46888bf6752f8d4e65afb0a8c67b26               75 Release
SHA256:
 e65405d61f505b6c62c61adc4330820ce9a8d850b839ce9de3c8114da9313b1c             2770 Packages
 f78327f58a7cf57703d206399bd693766c66c98a3296e3a84aef33c54f6c8b1f               75 Release
SHA512:
 88ba61c27d624c01a61eff8722669a8e51d7055db4f4bdd49aa8ff965f44ab6388b6cd4aa502d22ef1a793e8fbf8510ed92946c6a9b53b313bddc0e2069421b3             2770 Packages
 30ef3ac9a9cabc3d40b63b2eaec615a77ef7eb33bb5a3c7c76cc95eab86cf74355a87811d985519b2d144952433b8c20e039aaca7eee26b6d459a86d78eaf9ee               75 Release
其中包含了生成时间、相关文件的哈希(Release 的哈希对应的是 MD5Sum 之前的部分),以及软件源相关的配置。该文件使用 apt-ftparchive 生成:
$ cd ..
$ cat main.conf
APT::FTPArchive::Release::Origin "vlab.ustc.edu.cn";
APT::FTPArchive::Release::Label "Vlab";
$ apt-ftparchive -c main.conf release builddir > builddir/Release
实际使用时的配置为:
或 DEB822 格式:
Signed-By 与 GPG 签名
从 apt 2.9.24 开始,没有 Signed-By 字段的源会视作废弃状态。以上不包含 GPG 签名的仓库在未来的 Debian 版本上可能会被拒绝使用。
官方源结构
如果观察过 Debian 或 Ubuntu 官方源的结构,可以发现它们会更加复杂,一般来讲,仓库的元数据会存储在 dists 目录下,而软件包则存储在 pool 目录下。dists 目录下第一层为发行版(Suites)目录。以 Debian 12 为例,最常使用的包含 bookworm, bookworm-updates 和 bookworm-backports 目录。
再向里一层则包含上面提到的 Release 文件,除了 Release 以外:
Release.gpg:Release文件的 GPG 签名。- 正规的发行版都会自带维护者的 GPG 公钥,在安装软件包时会自动验证软件包的签名,避免恶意篡改。
InRelease:附加了 GPG 签名的Release文件。ChangeLog:变更记录。contrib/,main/,non-free/,non-free-firmware/:不同的组件(Components)。
组件目录中则包含了:
Contents-<arch>.gz:用于帮助apt-file等工具快速查找包含某文件的软件包。binary-<arch>/:二进制包。source/:源代码包。by-hash/:文件名为哈希值的元数据文件。APT 在读取Release之后,在Acquire-By-Hash: yes时,会首先根据哈希读取该目录下的需要的文件。这可以帮助使用rsync同步内容的镜像站点提升可用性,避免在同步过程中部分文件失效/未同步等导致的无法使用的问题。
架构目录(二进制/源代码包):
Packages.{gz,xz}:压缩后的Packages文件。- 如果软件源不在本地文件系统上,那么
Packages必须压缩,否则 APT 可能不会读取。
- 如果软件源不在本地文件系统上,那么
Release:该架构的元数据。by-hash/:同上。
-
https://askubuntu.com/a/1138405,引用自 The Debian System: Concepts and Techniques 一书。 ↩
@taoky: 安全更新源与镜像站
曾经有人问过这个问题:镜像站提供安全更新源的话,怎么保证镜像站本身不会通过拖延更新等方式阻止用户获取安全更新?
首先,Debian 不鼓励修改默认的安全更新源,甚至其安装器在默认模式下,即使设置了镜像站,安全更新仍然会从官方获取(这也是 Debian 安装器在某些网络环境下很慢的一大原因),需要使用专家模式才能修改。
然后,安全更新源的
Release文件有一个重要的字段:Valid-Until,例如:Valid-Until距离Release生成为期一周,因此即使拖延,也不允许超过一周,否则 APT 会拒绝使用这个软件源。不过仍然请注意,在生产环境下,谨慎使用任何镜像站提供安全更新源。